Nissan Altima (L33) 2013-2018 Owners Manual: How to use the remote keyless entry function
The remote keyless entry function can operate all door locks using the remote keyless function of the Intelligent Key. The remote keyless function can operate at a distance of 33 ft (10 m) away from the vehicle. The operating distance depends upon the conditions around the vehicle.
The remote keyless entry function will not function under the following conditions: ● When the Intelligent Key is not within the operational range.
● When the doors or the trunk are open or not closed securely.
● When the Intelligent Key battery is discharged.
CAUTION
When locking the doors using the Intelligent Key, be sure not to leave the key in the vehicle.
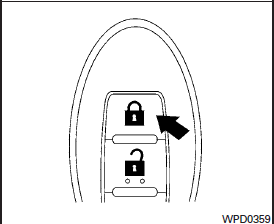
Locking doors
1. Place the ignition switch in the LOCK position.
2. Close all doors.
3. Press the  button on the
Intelligent
Key.
4. The hazard warning lights flash twice and the horn beeps once.
5. All doors will be locked.
CAUTION
After locking the doors using the Intelligent Key, be sure that the doors have been securely locked by operating the door handles.
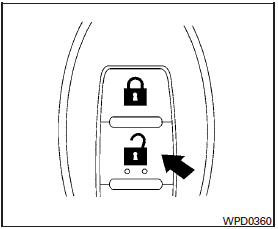
Unlocking doors
1. Press the  button on the
Intelligent
Key.
2. The hazard warning lights flash once.
3. Press the  button again within 5
seconds
to unlock all doors and trunk.
NOTE:
The unlocking operation can be changed in Selective door unlock in the Vehicle Settings of the vehicle information display. For additional information, see “Vehicle information display” in the “Instruments and controls” section of this manual.
All doors will be locked automatically unless one
of the following operations is performed within
1 minute after pressing the 
button:
● Opening any doors.
● Pushing the ignition switch.
The interior light illuminates for a period of time when a door is unlocked and the room light switch is in the DOOR position.
The light can be turned off without waiting by performing one of the following operations: ● Placing the ignition switch in the ON position.
● Locking the doors with the Intelligent Key.
● Switching the room light switch to the OFF position.
● Switching the Auto Room Lamp to the OFF position in Vehicle Settings of the vehicle information display. See “Vehicle information display” in the “Instruments and controls” section.
Opening windows (if so equipped)
The Intelligent Key allows you to simultaneously open windows equipped with automatic operation.
● To open the windows, press the 
button
on the Intelligent Key longer than
3 seconds after all doors are unlocked.
The door windows will open while pressing
the  button on the Intelligent Key.
The door windows cannot be closed by using the Intelligent Key.
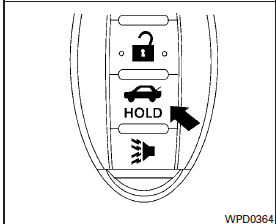
Releasing the trunk lid
Press the  button for longer
than 0.5 seconds
to open the trunk lid. The trunk release
button will not operate when the ignition switch is
in the ON position or when the trunk cancel
switch is in the OFF position. See “Cancel
switch” in this section.
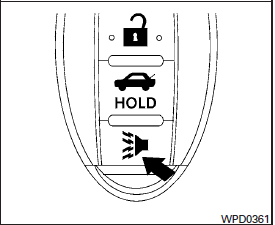
Using the panic alarm
If you are near your vehicle and feel threatened,
you may activate the panic alarm to call attention
by pressing and holding the  button
on the
Intelligent Key for longer than 0.5 seconds.
The panic alarm and headlights will stay on for a period of time.
The panic alarm stops when: ● It has run for a period of time, or ● Any button is pressed on the Intelligent Key.
● The request switch on the driver or passenger door has been pushed and the Intelligent Key is in range of the door handle.
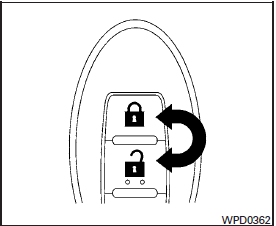
Answer back horn feature
If desired, the answer back horn feature can be
deactivated using the Intelligent Key. When deactivated
and the LOCK  button is
pushed the hazard indicator flashes twice and
when the UNLOCK  button is pushed,
neither
the hazard indicator nor the horn operates.
NOTE:
If you change the answer back horn and light flash feature with the Intelligent Key, the vehicle information display screen will show the current mode after the ignition switch has been cycled from the OFF to the ON position. The vehicle information display screen can also be used to change the answer back horn mode. See “Answer back horn” in the “Instruments and controls” section.
To deactivate: Press and hold the

and  buttons for at least 2
seconds.
The hazard warning lights will flash 3 times to confirm that the answer back horn feature has been deactivated.
To activate: Press and hold the 
and  buttons for at least 2 seconds
once
more.
The hazard warning lights will flash once and the horn will sound once to confirm that the horn beep feature has been reactivated.
Deactivating the horn beep feature does not silence the horn if the alarm is triggered.

 NISSAN Intelligent Key® operation
 Warning signals