Nissan Altima (L32) 2007-2012 Service Manual: Rear seat
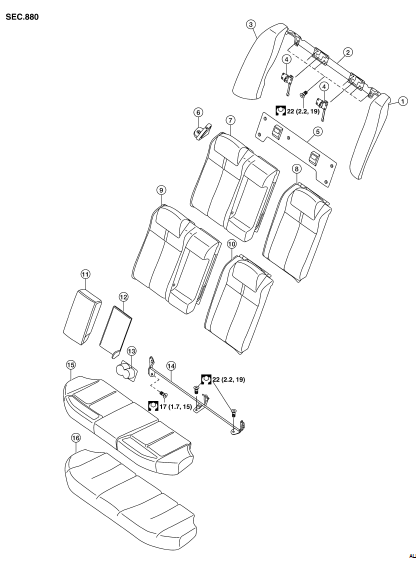
Exploded View
BENCH SEAT
1. Rear seat side bolster assembly LH
2. Rear seatback latch mount
3. Rear seat side bolster assembly RH
4. Rear seatback latch
5. Rear seatback trim panel
6. Seat belt guide
7. Rear seatback pad RH
8. Rear seatback pad LH
9. Rear seatback pad trim RH
10. Rear seatback pad trim LH
11. Armrest
12. Armrest trim panel
13. Cup holder
14. Rear seatback hinge assembly
15. Rear seat cushion trim
16. Rear seat cushion
Removal and Installation
REMOVAL
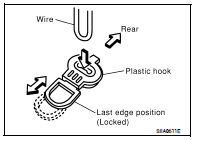
1. Remove the rear seat cushion trim and pad.
• Pull the lock at the front bottom of the seat cushion forward
(one for each side), and pull the seat cushion upward to
release the wire from the plastic hook, then pull the seat cushion
forward to remove.
2. Remove the seat belt webbing from the guides.
3. Fold seatbacks forward.
4. Remove upper seatback trim panel.
5. Remove rear side bolster bolts.
6. Lock seatbacks in upright position.
7. Remove the seatback hinge anchor bolts and nut.
 Front seat
 Disassembly and assembly