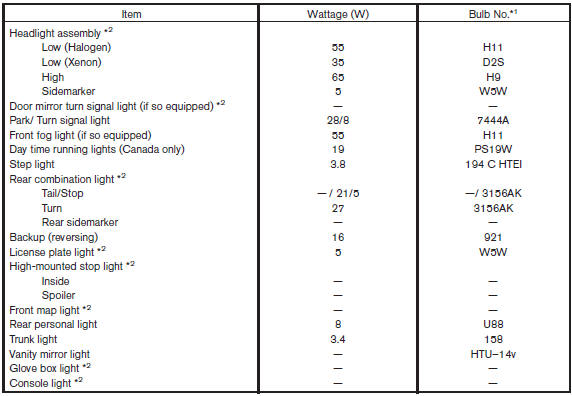
Nissan Altima (L33) 2013-2018 Owners Manual: Exterior and interior lights
*1 Always check with the Parts Department at a NISSAN dealer for the latest
parts information.
*2 See a NISSAN dealer for assistance.
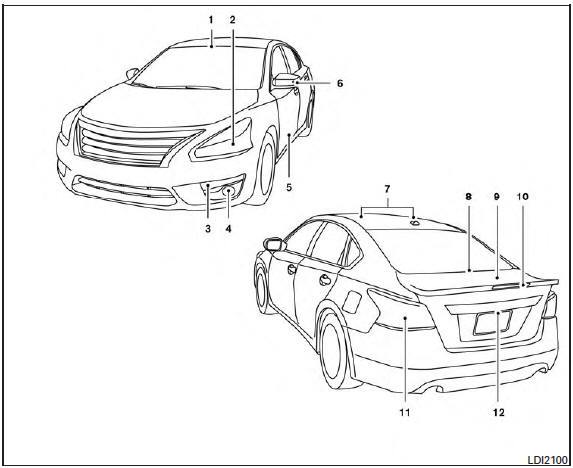
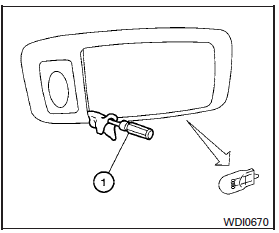
1. Front map light
Replacement procedures
All other lights are either type A, B, C or D. When
replacing a bulb, first remove the lens, light
and/or cover.
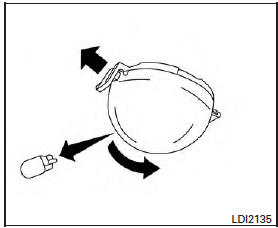
Step light
Use a cloth 1 to protect the housing.
Personal light
Use a cloth 1 to protect the housing.
Rear combination light
Bulb replacement requires the removal of the rear
combination light assembly. If replacement is required,
see your NISSAN dealer.
Trunk light
1. Disconnect the negative battery cable.
2. Remove the fasteners A ; carefully pull back
the front fender protector.
3. Rotate the bulb B counterclockwise and
pull out to remove. ...
If you have a flat tire, see “Flat tire” in the
“In case of emergency” section of this
manual. ...
Other materials: Vehicle information display - 5 inch (13 cm) Type A (if so equipped)
The vehicle information display is located
to the left of the speedometer. It displays
such items as:
Vehicle settings
Indicators and warnings
Information/warning messages
Tire pressure information
Drive computer information
Cruise control system information
Driving Aids (if so equipped)
N ...
Rear window and outside mirror
(if so equipped) defroster switch
To defrost the rear window glass and outside
mirrors (if so equipped), place the ignition
switch in the ON position and push the
rear window defroster switch on. The rear
window defroster indicator light on the
switch comes on. Push the switch again to
turn the defroster off.
The rear window defro ...
Engine compartment check locations
2.0L 4 cylinder (KR20DDET engine model)
Engine coolant reservoir
Drive belt location
Engine oil filler cap
Brake fluid reservoir
Battery
Fuse/Fusible link box
Air cleaner
Radiator cap
Engine oil dipstick
Windshield-washer fluid reservoir
Refer to the page number indicated in
parenth ...
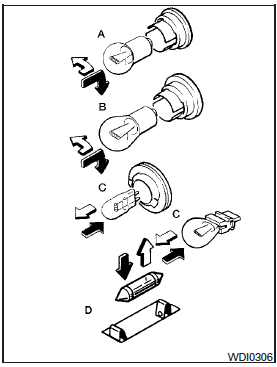
 Indicates bulb removal
 Indicates bulb installation
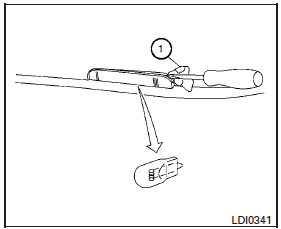
 Park/turn signal lights
 Wheels and tires