Nissan Altima (L32) 2007-2012 Service Manual: Precaution
Precaution for Supplemental Restraint System (SRS) "AIR BAG" and "SEAT BELT PRE-TENSIONER"
The Supplemental Restraint System such as “AIR BAG” and “SEAT BELT PRE-TENSIONER”, used along with a front seat belt, helps to reduce the risk or severity of injury to the driver and front passenger for certain types of collision. This system includes seat belt switch inputs and dual stage front air bag modules. The SRS system uses the seat belt switches to determine the front air bag deployment, and may only deploy one front air bag, depending on the severity of a collision and whether the front occupants are belted or unbelted.
Information necessary to service the system safely is included in the SR and SB section of this Service Manual.
WARNING: • To avoid rendering the SRS inoperative, which could increase the risk of personal injury or death in the event of a collision which would result in air bag inflation, all maintenance must be performed by an authorized NISSAN/INFINITI dealer.
• Improper maintenance, including incorrect removal and installation of the SRS, can lead to personal injury caused by unintentional activation of the system. For removal of Spiral Cable and Air Bag Module, see the SR section.
• Do not use electrical test equipment on any circuit related to the SRS unless instructed to in this Service Manual. SRS wiring harnesses can be identified by yellow and/or orange harnesses or harness connectors.
General precautions for service operations
• Never work with wet hands.
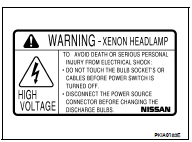
• The xenon headlamp system includes a high voltage generating part. Be sure to disconnect battery negative cable (negative terminal) or power fuse before removing, installing, or touching the xenon headlamp (including lamp bulb).
• Turn the lighting switch OFF before disconnecting and connecting the connector.
• When turning the xenon headlamp on and while it is illuminated, never touch the harness, bulb, and socket of the headlamp.
• When checking the headlamp on/off operation, check it on vehicle and with the power connected to the vehicle-side connector.
• Do not touch the headlamp bulb glass surface with bare hands or allow oil or grease to get on it. Do not touch the headlamp bulb just after the headlamp is turned off, because it is very hot.
• Install the xenon headlamp bulb socket correctly. If it is installed improperly, high-voltage leak or corona discharge may occur that can melt the bulb, connector, and housing. Do not illuminate the xenon headlamp bulb out of the headlamp housing. Doing so can cause fire and harm your eyes.
• When the bulb has burned out, wrap it in a thick vinyl bag and discard.
Do not break the bulb.
• Leaving the bulb removed from the headlamp housing for a long period of time can deteriorate the performance of the lens and reflector (dirt, clouding). Always prepare a new bulb and have it on hand when replacing the bulb.
• When adjusting the headlamp aiming, turn the aiming adjustment screw only in the tightening direction. (If it is necessary to loosen the screw, first fully loosen the screw, and then turn it in the tightening direction.) • Do not use organic solvent (paint thinner or gasoline) to clean lamps and to remove old sealant.
 Both side front fog lamps are not
turned on
Both side front fog lamps are not
turned on On-vehicle maintenance