Nissan Altima (L32) 2007-2012 Service Manual: Front fog lamp
Bulb Replacement
REMOVAL
The fog lamp is a semi-sealed beam type which uses a replaceable halogen bulb.
CAUTION: • Do not touch the glass of bulb directly by hand. Keep grease and other oily substances away from it.
Do not touch bulb by hand while it is lit or right after being turned off. Burning may result.
• Do not leave bulb out of fog lamp reflector for a long time because dust, moisture smoke, etc. may affect the performance of fog lamp. When replacing bulb, be sure to replace it with new one. 1. Position the front fender protector aside. Refer to EXT-19, "Removal and Installation".
2. Disconnect the fog lamp electrical connector.
3. Turn the fog lamp bulb counterclockwise to remove it.
INSTALLATION
Installation is in the reverse order of removal.
Removal and Installation
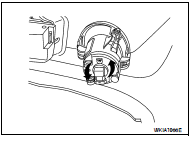
REMOVAL
The fog lamp is a semi-sealed beam type which uses a replaceable halogen bulb.
CAUTION: • Do not leave fog lamp assembly without bulb for a long period of time. Dust, moisture, smoke, etc.
entering the fog lamp body may affect the performance. Remove the bulb from the headlamp assembly just before replacement bulb is installed.
• Grasp only the plastic base when handling the bulb. Never touch the glass envelope. Touching the glass could significantly affect the bulb life and/or fog lamp performance. 1. Remove inner splash shield.
2. Position the fender protector aside. Refer to EXT-19, "Removal and Installation".
3. Disconnect the fog lamp electrical connector.
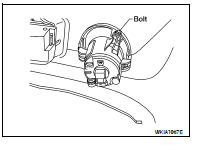
4. Remove bolt from top of fog lamp.
5. Remove fog lamp.
INSTALLATION
Installation is in the reverse order of removal.
Check fog lamp aiming adjustment. Refer to EXL-252, "Aiming Adjustment".
 Headlamp
 Stop lamp