Nissan Altima (L32) 2007-2012 Service Manual: Rear spoiler
Removal and Installation
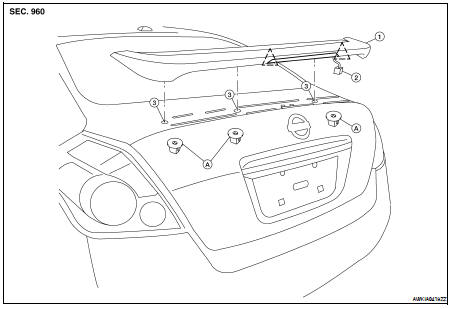
1. Rear spoiler assembly
2. High mounted stop lamp harness
3. Gasket
A. Nuts
Removal
1. Remove trunk lid finisher (if equipped). Refer to INT-23, "Removal and
Installation".
2. Disconnect high mounted stop lamp connector.
3. Using a trim stick, carefully release the clips and pry foam tape free from
trunk lid surface.
CAUTION:
Use care not to damage painted surfaces during removal of, or releasing adhesive
backed foam
tapes.
4. Release the high mounted stop lamp harness grommet from trunk lid, then
remove rear spoiler.
Installation
Installation is in the reverse order of removal.
NOTE:
• Before installing rear spoiler, clean the surface where it will be mounted
with isopropyl alcohol or equivalent
to degrease the surface.
• Before installing, be sure there are no gaps or waves in the foam tape where
the surfaces meet.
• During installation, be sure grommet of high mounted stop lamp harness is
fully seated into trunk lid opening
prior to final rear air spoiler placement.

 License lamp finisher
 Body repair coupe